
BEHIND THE SCENES: POSTPRODUCTION
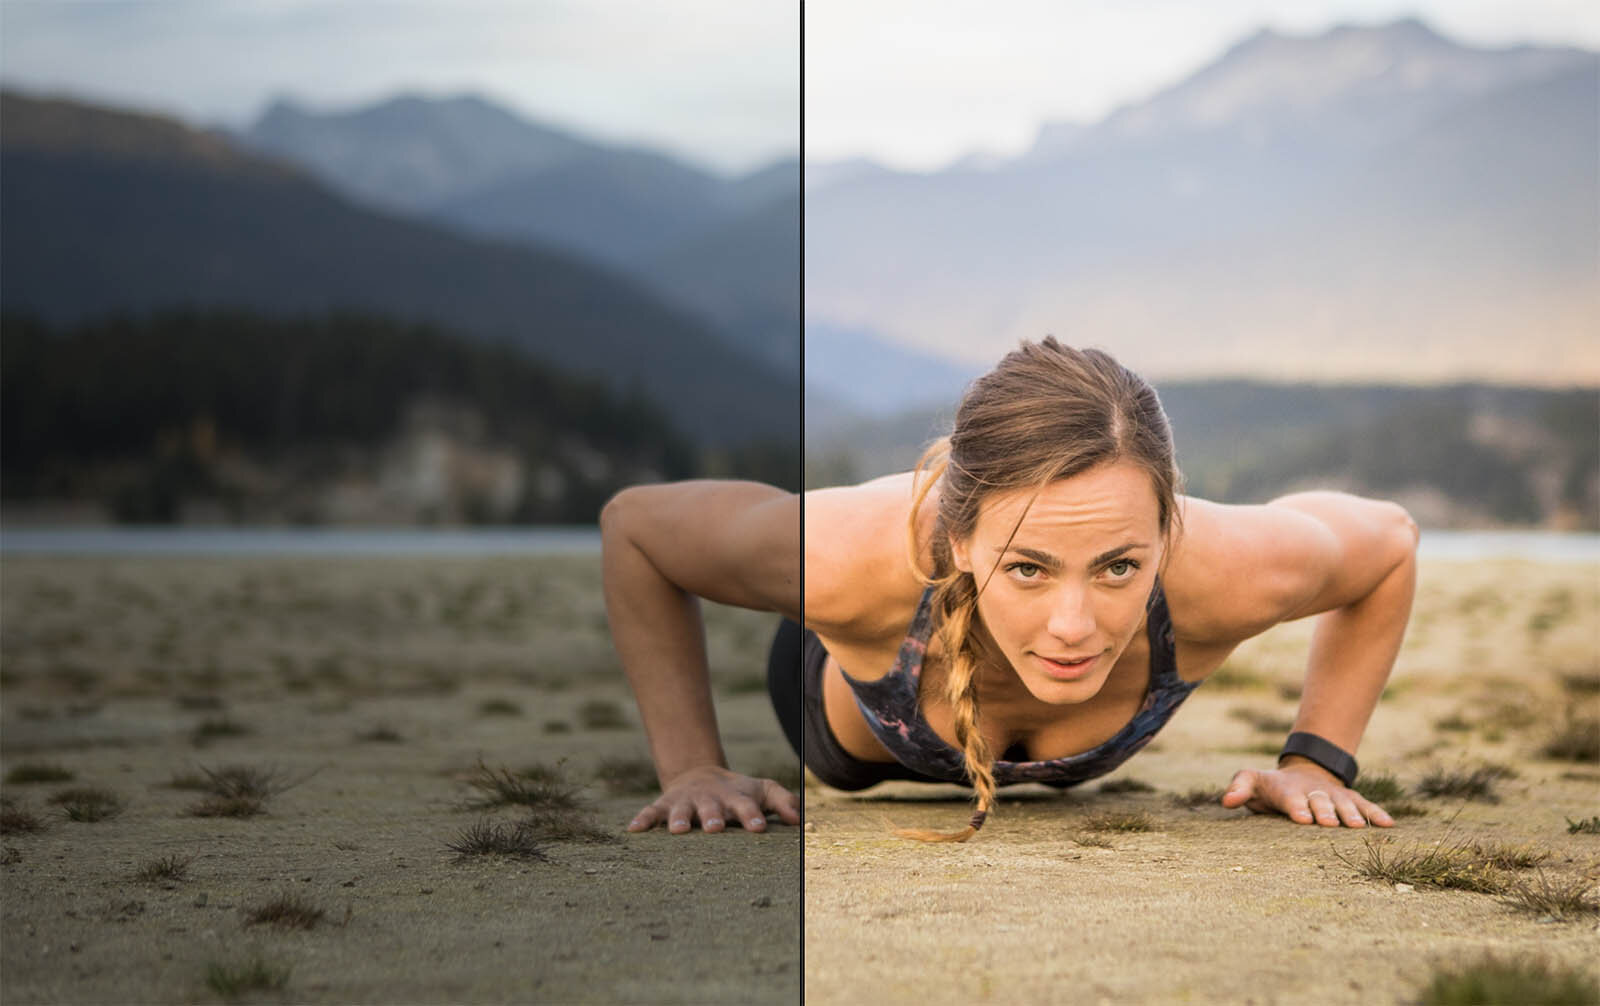
Before and After
For us photographers, there is much more to creating an image than just snapping a photo. There is the process of planning and scouting to create a certain image before we even touch the camera gear. When taking a photo, I already know if it is going to be black and white, what kind of feel I am going for, and what adjustments I will apply to get a certain look for that photograph.
We are looking for good light, the right location, and various patterns. Those all change depending on what we are trying to achieve with the image. But that is only half of the job.
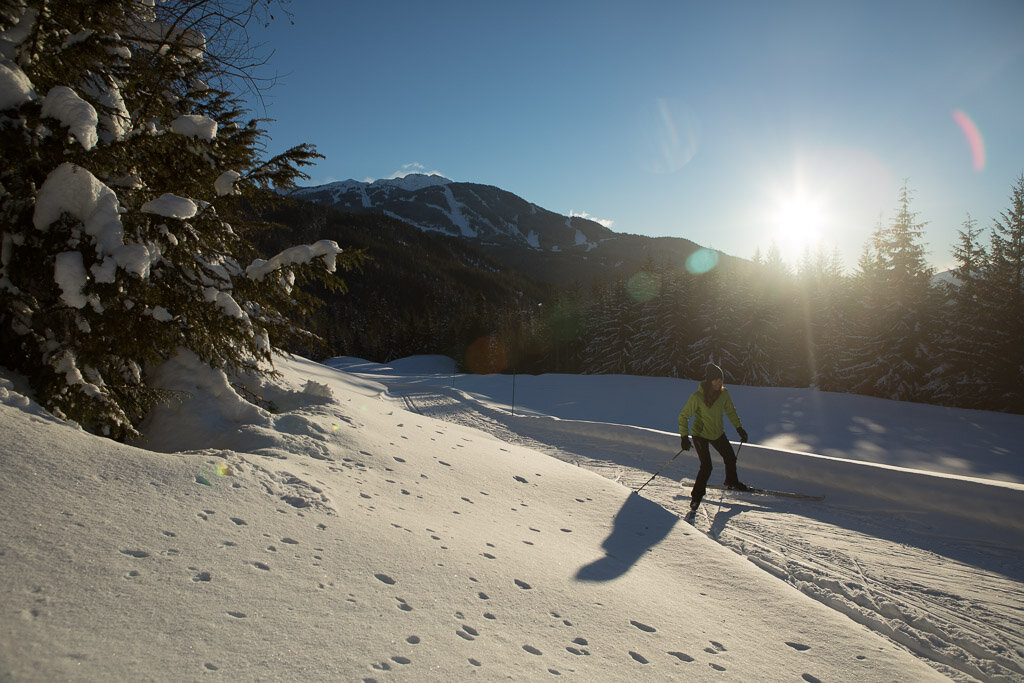
The Vision: Capture new xc skiing images in beautiful light with mountains in the background.
The Challenge: Creating warm looking and inviting images while we were battling -20C weather.

The Solution: Back-lighting the image during sunset added the desired warmth to a blue and cold looking sky. Creating lens flare and warming up the image in post production gave us a feeling of a beautiful winter day. The Image: Single exposure edit. Color adjustments and post production performed in Lightroom.
The reason photographers don’t give out their original raw files is because that is not the final image we had in mind when we shot it. Some photographers do only minor adjustments while others may find their work is just beginning. Many photographers are known for their style and photo treatment after the image is taken and that is their brand. It could be a photograph changed to fine art or a photographer known for strong, contrasted black and white images. It is their signature product and most of their work starts after the image is taken.
For other photographers, the editing is not as critical, however they still use the basic adjustments to tweak the image to their liking and style.
I thought I would pull out a few images so you can see the difference before and after editing. By photographing in raw format, I’m able to have complete control over how the final image will look. The camera has it’s own default settings that are applied when you shoot in jpg. Colour saturation, contrast, and sharpness are all automatically adjusted making it more difficult to control in the editing process. A raw file is stripped of all those settings so that’s why they are more dull and not appealing when exported from the camera. By starting in raw, the photographer can apply their own setting during the editing process bringing the image to it’s rich and eye appealing potential.

The Vision: Capturing a portion of the spa experience. Creating an image that portrayed the silence etiquette at Scandinavia spa.

The Solution: Focus on the model in the hot tub. Bring attention to her relaxing in silence among the soothing surroundings.
The Image: Besides color and other image adjustments, I did some basic skin retouching removing any blemishes or hairs across the model’s face to improve the final look.

The Vision: Seeing my man coming home from a bike ride while he was caught in storm.
From the moment I saw his face, I knew I was getting back outside with him to take photos. I wanted to create a dramatic portrait portraying the rough time he had out there.

The Solution: I knew converting this image to Black and White would help bring out the contrast and highlight the mud and water on his face. By doing this I was able to tell a story and portray a strong image in one photo.
The Image: Single exposure edit. Converted to Black and White, bumped up contrast and clarity - all created in Lightroom.

The Vision: Capture people enjoying summer on the patio on a sunny day.
The challenge: The patio is lit at sunrise when the pub is closed. Shooting a patio in the afternoon shade was the biggest challenge. Because of the location at the bottom of the mountain, it was hard to get this done.

The Solution: I was watching where the sun would set in the evenings and wanted to create an image were the sun is setting past the GLC roof. Luckily we had a great weather in early July and I was able to get the shot in the right time frame.
The Image: The photo is 5 x exposure edit. HDR bracketing and manual blending using Photoshop and Lightroom. Post production and color enhancements were done in Lightroom.

The Vision: Capture an exterior dusk shot for a real estate company
The Challenge: Raining on the day of the shoot with no possibility of rescheduling
The Solution: Taking multiple exposures to blend later and replace a sky into final image.
The Image: 20x exposure edit with sky replacement using Photoshop. Final color adjustments and post production in Lightroom